Visit the live demo website at https://write-off.herokuapp.com
Login using the below credentials:
username: demo
password: tryitout


As a hobby writer, I noticed that when I wanted to start writing new books I would spend vast amounts of time lost in documents trying to plan incohesively. I created Write-Off as a simple, minimalistic solution to help other writers easily plan, reference and even write their stories, all within one web app.
The website has 3 main branches for a given project:
-
Write - A place for you to write your book
-
Characters - A section where users can create, describe and store their characters for a given project, as well as add affiliations to other characters.
-
Timeline - A simple on the surface - complex underneath timeline that allows the user to organise the events/plot points of their story into bitesize chunks. Users can change the order of these dynamically, include what characters are involved in which events, set a time for the event, and more, all without refereshing the page.
My project is distinctive to other projects done thus far for the following reasons:
-
It is a tool to help users, rather than a service/network. The primary goal is not interaction between users.
-
I have implemented more complex javascript code compared to previous projects, taking advantage of the
moduletag and theconstructorclasses. -
I have added features with the above code that goes beyond previous projects, such as a complex CRUD system, a drag and drop feature utilizing the javascript drag and drop API, and data manipulation to produce beautiful charts and interesting statistics.
-
My project utilizes the Django REST framework in addition to traditional form-based input.
-
Django Signals was leveraged to create a unique slug-based url display, which ensures unique urls across users and writing projects.
-
Unit tests were implemented to evaluate the effectiveness of my slug implementation.
-
Chart.js was used to provide a means to display my dynamic data.
-
The application was build using 5 models on the back-end and 14 javascript scripts in order to create real-time updates on the front-end without refresh.
-
The website is also mobile responsive, achieved 100% through custom CSS (no CSS libraries/frameworks were used for this project).
There are 5 models used in this project:
The User class is an extension of Django's AbstractUser model. This stores the user's username, password hash, session information etc.
The Genre model stores all the different genres that can be selected when making a new writing project. This is added as a ForeignKey to the Project class.
The Project model links to most other models, keeping track of which project contains which characters, timeline events, and so on. The author of the project is stored, as well as the title, slug, genre and the written content.
The Character model holds all information for a single character. This includes the name, age, personality, appearance, character affiliations (using a ManytoManyField to self) and finally an other field for any extra information about a given character.
The TimelineItem model stores a single event in a story. This includes, but is not limited to, the title of the event, the content, the characters involved, and whether it has been completed or not.
- This is the website's landing page. The idea was to create an engaging landing page that draws in a potential new user. This links to the
register/page.
- The register route allows the user to register a new account, and checks and presents errors if the username is already taken, if the passwords don't match, and more.
- The login page allows the user to login provided that they have a valid username and password. Error checking is also present here.
- Logs the user out, and redirects to the login page.
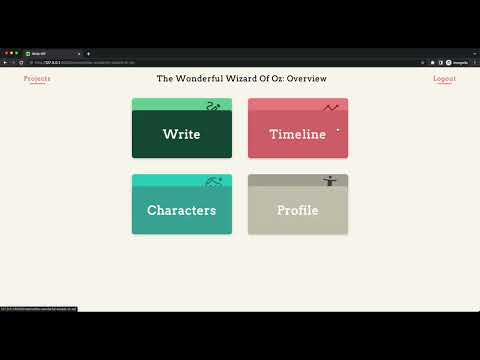
- The overview page acts as an intermediary page to allow the user to navigate to the 4 main branches of the website.
-
The Index page is the main hub for a users writing projects. It features project cards with the name, genre, date created and date last edited. Django forms is used to create a new project, after specifying a project name and genre.
-
If a user wishes to update their project, this is done using the REST API, making a request to
project/edit/<slug:slug>/which updates without refresh. -
It should be noted that any information changed will update the last edited model. Even data changed in the
Character/TimelineItemmodels.
-
This route lists all the characters for a given project. Users can create, update and delete their characters using a more traditional django form. When editing, Javascript is used to dynamically change the "New Character" form into an "Edit Character" form. This saved me from creating a different route just for editing and provides a better UX.
-
Javascript is also used for the visuals of the page, such as expandable menus.
The timeline page shows a collapsed list of the timeline events. There are 3 columns, a beginning, middle and end column. When the user requests this page, the information is pulled from the REST API at api/project/timeline/<slug>/<cid>/ which displays the timeline events contained in each column. The user can manipulate the data here in a number of ways:
Simple View
-
Add button - Clicking the "+ Add" button will dynamically create a new timeline item, using the
api/project/timeline/<slug>/create/url. -
Delete - A user can delete a timeline event by double clicking the event box.
-
Edit - One click allows the user to input a new title for the event. On blur, the user's data will be saved through the
api/project/timeline/<slug>/edit/<id>/endpoint. -
Position - Clicking and dragging an event allows the user to change an item's position. It is possible to change the order within the current column, or to move the item to a new column. On
dragleave, the api will be contacted at the same route as above. -
Expand - Clicking the arrow will expand a single timeline event into a detailed view. This allows for detailed editing/input of data for a given event.
Detailed View
The detailed view data is displayed via the api/project/timeline/characters/<slug>/<id>/ route. Displayed in the modal are the following features:
-
Summary - Users can input a detailed summary for the event.
-
Time - Users can add a time to mark when the event happened.
-
Characters - A writer can include what characters are involved in the event. Clicking on a character will add it to the timeline event model, contacting the api at
api/project/timeline/<slug>/edit/characters/<id>/to do so. -
Completed - Users can mark an event as completed once its been written into the book. If completed, this will increase the percentage completion indicated on the project main page.
-
Delete - The event can be deleted from here as another option for users.
-
Save/Cancel - Finally, users can choose to save their edited data, or cancel it. Saving will send a request to
/api/project/timeline/slug/edit/detailed/<id>/. Which will validate and accept or reject.
The write page allows the user to write their book in a simple, easy-to-understand format. The book content is initially loaded via the API at /api/project/write/<slug>/book/
-
Arrow navigation - Uses javascript to allows the user to scroll to the top or the bottom of their content with an easy click.
-
Save - The user can save their progress by clicking the "SAVE" button. This sends a PUT request to the API at
/api/project/write/<slug>/book/edit/and allows the user to quickly save without the need to refresh.
The User profile page displays statistics from all of your projects. This uses the API in combination with chart.js and javascript to display the data. The data is only loaded on scroll to save on resources and also to display animations to the user. The API endpoints used are:
-
/api/stats/<uid>/genres/- displays a doughnut chart with information on the user's project genre choices. -
/api/stats/<uid>/characters/count/- displays a pie chart with information on how many characters are in each project. -
/api/stats/<uid>/timelines/- displays a pie chart with information on the total percentage completion for all timeline events. -
/api/stats/<uid>/characters/- displays a bar chart detailing the number of affiliations each character has.
Total Count statistics are pulled directly from the database:
-
Project Count - lists the number of projects
-
Characters Created - counts the number of total characters
-
Timeline Items Forged - counts the number of total timeline events
-
Words Written - the total number of words written over all projects
Finally, character badges are requested from the API:
-
Attention Seeker - displays the character with the most friends
-
Loner - displays the character with the least friends
-
Ancient - displays the oldest character
-
Fresh - displays the youngest character (if not
null)
The project is split into two apps:
api and writeoff.
serializers.py- Contains the serializers used for the Djano REST API.urls.py- Stores the API urls. Note that all API routes begin withapi/.views.py- The views file for the API routes__pycache__,__init__.py- Django-generated files.
-
static- Contains the assets, fonts and javascript files used in the project.assets- Houses the images and svgs used.fonts- Contains the fonts used.templates- Contains all the html templates for each page.characters.html- Characters Page.index.html- Main project page.landing.html- Landing page.layout.html- Provides the sidebar layout for the write, timeline and characters page.login.html- Login page.overview.html- Overview page for a single project.register.html- User registration page.timeline.html- Timeline events page.userprofile.html- User profile page.write.html- Page for writing a book.
characterPage.js- Script for the character pageCharacterPill.js,Column.js,Dropzone.js,Item.js,Timeline.js,TimelineAPI.js- All modular files that are imported intoTimelineItemPage.js, which compiles the code for the Timeline Page of the app.cookie.js- Used to provide a CSRF cookie when making API calls usingfetch.Modal.js- Utility function used to open/close modals on a page.indexPage.js- Script for the main projects page.userPage.js- Script used for the user profile page.writePage.js- Script used for the write page.styles.css- Contains all the CSS styling for all pages.
-
__init.py__- Generated by Django. -
admin.py- Admin file used to register models. -
apps.py- App registration file. -
forms.py- Contains theProjectFormandCharacterFormmodel forms. -
models.py- Houses all the models used to interact with the database for the project. -
tests.py- Contains unit tests and a test database. -
urls.py- Contains the URLs for the application (excluding the API routes, which are housed in theurls.pyunder the API directory). -
utils.py- Contains the slugify function used to create unique slugs. -
views.py- Houses all the routing logic for the non-API side of the app.
.gitignore- Defines files flagged for git to ignore.db.sqlite3- SQLite database.manage.py- Django-generated project managing utility.requirements.txt- Files required to run the application.
- First, fork the repository into your own system.
- Ensure that both Django and Python are installed on your system.
- View the `requirements.txt file to ensure that you have installed the Django Rest Framework onto your system.
- Start the app through the command
python manage.py runserver. - In your browser, navigate to the
loginpage. - Login using the below credentials:
Or create an account on the registration page.
username: demo
password: tryitout
-
Practice: I originally had plans for a practice page, where writers could receive a daily writer's prompt and write a short story to the response. The more I thought about it, the bigger the features I wanted i.e:
- Ability to submit prompts
- Feature to score others' writing prompts
- Check your scores/streak for your writing prompt short stories.
And more. This feature may well be suited to its own web app!
-
Individual project stats: I would like to add an individual stats page for each project, akin to the overall stats page currently implemented.
-
Accessiblity: Write-Off was made with accessibility in mind, but time constraints meant that I could not fully implement complete accessibility across every page. I would like to finish the accessibility (including tabbing) in the future.
-
Optimisation Things such as minifying CSS, compressing and optimizing images, caching certain items etc.